Hexo 操作指令

Hexo操作指令紀錄

建立Github靜態網頁

  • 首先於Github內建立新repository
  • Repository name的部分命名為:GithubUserName.github.io
  • 直接Create repository

到這裡建立靜態網頁的第一步就完成了!

建立本地Git資源

  • 首先於任意資料夾新增git資料夾
  • 於命令提示窗口切入該git資料夾
  • 輸入git clone yourRepositoryURL
  • 按下Enter送出指令

安裝HEXO部落格插件

  • 於命令提示窗口切入該專案
  • 輸入npm install -g hexo-cli

Hexo 發佈文章

  • 發佈新文章: hexo new PostName
  • 發佈後透過指令hexo generate建立靜態網頁
  • 建立靜態網頁後再輸入hexo deploy佈署網頁至github

Facebook Account Kit Use Guide

Facebook Account Kit

先前Firebase也有推出Auth驗證方式,整合了Email, 簡訊等方式,這次輪到FB推出整合帳戶登入工具囉!

前往FB網站進行新手教學

FB Account Kit Guide

  • 第一步 - 註冊FB開發者帳號

  • 第二步 - 建立應用程式編號

  • 第三步 - 新增產品( Account Kit )

按下設定即可新增並進行設置

  • 第四步 - 取得Account Kit Token

這是要在App裡面的strings.xml設定的value之一,先記住位置

<string name="client_token">4951127*****************</string>

  • 第五步 - 取得APP ID

這是要在App裡面的strings.xml設定的value之一,先記住位置

<string name="app_id">121********</string>

  • 第六步 - 匯入官方Account Kit Sample

Account Kit Sample 傳送門

基本上先用AccountKitSimpleSample做測試,等熟悉之後再去了解AccountKitSample即可

這裡不贅述怎麼匯入專案,但是匯入之後有幾個要修改成自己的數值必須注意

res -> values -> strings.xml

1
2
3
<string name="ak_login_protocol_scheme">ak60951383911****</string>
<string name="app_id">60951383911****</string>
<string name="client_token">e126a6ca1c0fa6af1f883e96********</string>

  • FB的教學指引沒有提到的是 ak_login_protocol_scheme 這裡的值就是 app_id 的值前面加上 ak 這樣即可
  • app_id 就是上面第五步提到的 APP ID
  • client_token 是上面第四步提到的 Account Kit Token

    這樣就算是設定完畢,可以直接執行專案測試看看囉!

  • 你可能會遇到的坑

如果看到這個畫面

首先檢查 app_idclient_token 設定是否為同一支APP的參數,我測試發現 ak_login_protocol_scheme 設定錯誤的話,其實還是能正常執行
如果還是不能成功傳送簡訊,請確認下圖框框中的選項有開啟( 開到是的地方 )

如果啟用用戶端存取權杖流程這裡是的話,那是無法做簡訊驗證及Email驗證的。

其他如果我有遇到坑會再補上來。

解決Android系統預設字體過大影響佈局問題

解決 Android 系統字體影響布局問題

2017/10/31 於教育訓練後遇到的問題,某些使用者將系統預設字體設定為 [極大] ,或者其他導致佈局混亂的大小,導致某些功能無法正常使用(被遮掩)。

解決辦法是 Configuration

  • 藉由取得系統Configuration以及其fontScale來做判斷,進而取得控制佈局的可能。
  • 以下直接以程式碼作範例:

    1
    2
    3
    4
    5
    6
    7
    8
    9
    10
    11
    12
    13
    14
    15
    Configuration configuration = getResources().getConfiguration();
    Resources res = getResources();
    if(configuration.fontScale>=1.35)
    {
    Configuration newconfig = new Configuration();
    newconfig.setToDefaults();
    newconfig.fontScale=1.2f;
    res.updateConfiguration(newconfig,res.getDisplayMetrics());
    }
    /*
    * fontScale = 1f (正常)
    * fontScale = 1.2f (大)
    * fontScale = 1.35f (極大)
    */
  • if判斷式中我設定為大於1.35就進行縮小Scale的行為,主要是因為當Scale大於1.35時,我的佈局會產生影響使用者體驗的問題,所以判斷式成立後,就直接將Scale縮小至1.2倍,如此即解決該問題。

Bitmap占用記憶體計算

圖片記憶體佔用計算方法

一張圖片佔用的記憶體由以下因素決定:

  • 圖片中的像素點個數
  • 每單位像素點佔用字節數

所以,一張圖片佔用的記憶體值為:

圖片長度 * 圖片寬度 * 單位像素點字節數

每單位像素點佔用字節數(byte):

ALPHA_8 1
ARGB_4444 2
ARGB_8888 4
RGB_565 2

舉例

一張RGB_565的圖片,長寬分別是1024 * 768,則:
1024 * 768 * 2 = 1572864 大約等於1.5Mb的記憶體佔用量

實際測試

1
2
3
4
5
6
7
8
9
10
11
Drawable drawable = img.getDrawable();
if (drawable instanceof BitmapDrawable)
{
BitmapDrawable bitDrawable = (BitmapDrawable) drawable;
Bitmap bit = bitDrawable.getBitmap();
int rowBytes = bit.getRowBytes();
int height = bit.getHeight();
Log.d("MYLOG","height: "+height+", width: "+bit.getWidth()+", rowBytes: "+rowBytes);
long memSize = rowBytes * height;
Log.d("MYLOG", "memSize = " + memSize + "B = " + formatFileSize(memSize)+"MB");
}

Result : D/ANDROID_LAB: memSize = 6460752B = 6.1614532470703125MB

這張圖是1916*843的圖,每一像素為4Byte,所以未經處理的圖片在Android系統中將會佔用6MB多的記憶體空間。

也就是說,浪費了6MB的空間,實際上只顯示了小小的一張圖在畫面,所以建議圖片顯示之前一定要先處理過圖片。

另外對圖片的處理,並非將KB數壓縮就能解決

舉例

以下三張圖片,實際放入imageView之後佔用的記憶體是相同的,並不會因為單純降低畫質而影響佔用記憶體大小

Q:100 DPI:300 Q:1 DPI:300 Q:1 DPI:30

Fragment & EventBus

Fragment & EvenBus

Video


activity_maim.xml

1
2
3
4
5
6
7
8
9
10
11
12
13
14
15
16
17
18
19
20
21
22
23
<?xml version="1.0" encoding="utf-8"?>
<RelativeLayout xmlns:android="http://schemas.android.com/apk/res/android"
xmlns:app="http://schemas.android.com/apk/res-auto"
xmlns:tools="http://schemas.android.com/tools"
android:layout_width="match_parent"
android:layout_height="match_parent">
<fragment
android:id="@+id/fragment"
android:name="klapper.caseupload.fragment1"
android:layout_width="wrap_content"
android:layout_height="wrap_content"
tools:layout="@layout/fragment1_layout" />
<fragment
android:id="@+id/fragment2"
android:name="klapper.caseupload.fragment2"
android:layout_width="wrap_content"
android:layout_height="wrap_content"
android:layout_below="@+id/fragment"
android:layout_marginTop="30dp"
tools:layout="@layout/fragment2_layout" />
</RelativeLayout>

fragment 1

1
2
3
4
5
6
7
8
9
10
11
12
13
14
15
16
17
18
19
20
21
22
<?xml version="1.0" encoding="utf-8"?>
<RelativeLayout xmlns:android="http://schemas.android.com/apk/res/android"
android:layout_width="match_parent" android:layout_height="match_parent">
<TextView
android:id="@+id/textView"
android:layout_width="wrap_content"
android:layout_height="wrap_content"
android:text="Fragment 1:"
android:textColor="#000000"
android:textSize="16sp"
android:textStyle="bold" />
<Button
android:id="@+id/send_btn"
android:layout_width="wrap_content"
android:layout_height="wrap_content"
android:layout_below="@+id/textView"
android:layout_marginLeft="15dp"
android:layout_marginTop="15dp"
android:text="Send Message" />
</RelativeLayout>

fragment 2

1
2
3
4
5
6
7
8
9
10
11
12
13
14
15
16
17
18
19
20
21
22
23
24
25
<?xml version="1.0" encoding="utf-8"?>
<RelativeLayout xmlns:android="http://schemas.android.com/apk/res/android"
android:orientation="vertical" android:layout_width="match_parent"
android:layout_height="match_parent">
<TextView
android:id="@+id/textView"
android:layout_width="wrap_content"
android:layout_height="wrap_content"
android:text="Fragment 2:"
android:textColor="#000000"
android:textSize="16sp"
android:textStyle="bold" />
<TextView
android:id="@+id/textView2"
android:layout_width="wrap_content"
android:layout_height="wrap_content"
android:layout_below="@+id/textView"
android:layout_marginLeft="15dp"
android:layout_marginTop="15dp"
android:text="Receive String..."
android:textSize="15sp"
android:textStyle="italic" />
</RelativeLayout>

MainActivity.java

1
2
3
4
5
6
7
8
public class MainActivity extends Activity {
@Override
protected void onCreate(Bundle savedInstanceState)
{
super.onCreate(savedInstanceState);
setContentView(R.layout.activity_main);
}
}

fragment1.java

1
2
3
4
5
6
7
8
9
10
11
12
13
14
15
16
17
18
19
20
21
22
23
24
25
26
27
28
29
30
31
32
33
34
35
36
37
38
39
40
41
42
43
44
45
46
47
48
49
50
51
52
53
54
55
56
57
58
59
60
61
62
63
64
public class fragment1 extends Fragment
{
private View rootView;
@Nullable
@Override
public View onCreateView(LayoutInflater inflater, @Nullable ViewGroup container, Bundle savedInstanceState)
{
rootView = inflater.inflate(R.layout.fragment1_layout, container, false);
Button sendMessage = (Button)rootView.findViewById(R.id.send_btn);
sendMessage.setOnClickListener(new View.OnClickListener()
{
@Override
public void onClick(View v)
{
EventBus.getDefault().post(new SomeEvent("Hello this is Fragment1!!"));
}
});
return rootView;
}
}
> fragment2.java
```java
public class fragment2 extends Fragment
{
private View rootView;
private TextView receiveString;
private String tmpString;
@Nullable
@Override
public View onCreateView(LayoutInflater inflater, @Nullable ViewGroup container, Bundle savedInstanceState)
{
rootView = inflater.inflate(R.layout.fragment2_layout, container, false);
receiveString = (TextView)rootView.findViewById(R.id.textView2);
return rootView;
}
@Subscribe(threadMode = ThreadMode.MainThread)
public void onEven(SomeEvent event)
{
tmpString += event.getMessage() + "\n";
receiveString.setText(tmpString);
}
@Override
public void onStart()
{
super.onStart();
EventBus.getDefault().register(this);
}
@Override
public void onStop()
{
super.onStop();
EventBus.getDefault().unregister(this);
}
}

Volley use guide

Volley

Get Start

import library

Open build.gradle and Add volley Support by Adding compile 'com.android.volley:volley:1.+'

Adding Permission

In AndroidManifests.xml add INTERNET Permission
<uses-permission android:name="android.permission.INTERNET"/>

Usage

Init RequestQueue RequestQueue mQueue = Volley.newRequestQueue(this);

Get

1
2
3
4
5
6
7
8
9
10
11
12
13
14
15
16
17
18
19
20
21
22
23
24
25
26
27
28
29
30
31
32
33
34
35
36
// String Request
StringRequest getRequest = new StringRequest("https://jsonplaceholder.typicode.com/posts",
new Response.Listener<String>()
{
@Override
public void onResponse(String s)
{
Log.d("MYLOG","The String: "+s);
}
}, new Response.ErrorListener()
{
@Override
public void onErrorResponse(VolleyError volleyError)
{
Log.d("MYLOG",volleyError.toString());
}
});
mQueue.add(getRequest);
// JSONObject Request
JsonObjectRequest jsonObjectRequest = new JsonObjectRequest(Request.Method.GET,
"https://jsonplaceholder.typicode.com/posts",null, new Response.Listener<JSONObject>()
{
@Override
public void onResponse(JSONObject response)
{
Log.d("MYLOG",response.toString());
}
}, new Response.ErrorListener()
{
@Override
public void onErrorResponse(VolleyError error)
{
Log.d("MYLOG",error.toString());
}
});
mQueue.add(jsonObjectRequest);

Post

1
2
3
4
5
6
7
8
9
10
11
12
13
14
15
16
17
18
19
20
21
22
23
24
25
26
27
28
29
30
StringRequest questpost = new StringRequest(Request.Method.POST,
"http://jsonplaceholder.typicode.com/posts",
new Response.Listener<String>()
{
@Override
public void onResponse(String response)
{
Log.d("MYLOG","String: "+response);
}
}, new Response.ErrorListener()
{
@Override
public void onErrorResponse(VolleyError error)
{
Log.d("MYLOG","ERROR: "+error.toString());
}
})
{
@Override
protected Map<String, String> getParams() throws AuthFailureError
{
Map<String,String> map = new HashMap<>();
map.put("title","foo");
map.put("body","bar");
map.put("userId","444");
return map;
}
};
mQueue.add(questpost);

PUT

1
2
3
4
5
6
7
8
9
10
11
12
13
14
15
16
17
18
19
20
21
22
23
24
25
26
27
28
29
30
31
32
33
34
35
36
StringRequest questpost = new StringRequest(Request.Method.PUT,
"https://jsonplaceholder.typicode.com/posts/1",
new Response.Listener<String>(
{
@Override
public void onResponse(String response)
{
Log.d("MYLOG","String: "+response);
}
}, new Response.ErrorListener()
{
@Override
public void onErrorResponse(VolleyError error)
{
Log.d("MYLOG","ERROR: "+error.toString());
}
})
{
// Add Header
@Override
public Map<String, String> getHeaders() throws AuthFailureError
{
Map<String,String> map = new HashMap<>();
map.put("Content-Type","application/x-www-form-urlencoded");
return map;
}
// Add Params
@Override
protected Map<String, String> getParams() throws AuthFailureError
{
Map<String,String> map = new HashMap<>();
map.put("title","SSSSSSSfoo");
return map;
}
};
mQueue.add(questpost);

onItemClickListener for RecyclerView

onItemClickListener 介面實作

  • 有時後會遇到某些功能實作之後沒有提供ItemClick的方法,這時候就要自己實作ItemClick介面來達成目的了!!

舉RecyclerView的例子

  • RecyclerView沒辦法直接實作.setOnItemClickListener
  • 所以不能像ListView一樣,取得使用者點到的那一個item
  • 手動實作itemClick可解決這個問題

如何實作?

  • 第一步 - 在RecyclerViewAdapter內實作介面
1
2
3
4
5
6
7
8
9
public interface onItemClickListener
{
void onItemClick(View view,int position);
}
private onItemClickListener onItemClickListener;
public void setOnItemClickListener(onItemClickListener onItemClickListener)
{
this.onItemClickListener = onItemClickListener;
}
  • 第二步 - 在onBindViewHolder透過OnClickListener達到目的

    1
    2
    3
    4
    5
    6
    7
    8
    9
    10
    11
    12
    if(onItemClickListener!=null)
    {
    holder.itemView.setOnClickListener(new View.OnClickListener()
    {
    @Override
    public void onClick(View v)
    {
    int layoutPos = holder.getLayoutPosition();
    onItemClickListener.onItemClick(v,position);
    }
    });
    }
  • 第三步 - RecyclerViewAdapter的部份完成之後,回到MainActivity就可以實作.onItemClickListener囉

    1
    2
    3
    4
    5
    6
    7
    8
    9
    RecycleViewAdapter mAdapter = new RecycleViewAdapter(this);
    mAdapter.setOnItemClickListener(new RecycleViewAdapter.onItemClickListener()
    {
    @Override
    public void onItemClick(View view, int position)
    {
    Log.d("MYLOG", "onItemClick: "+position);
    }
    });

大功告成!!

PopupWindow

簡單介紹下就是阻塞式的浮動窗口(類似dialog,但dialog為非阻塞式)

視窗下面的(退出、設置、取消)就是PopupWindow產生的頁面,其特點是跳出時,只會響應目前PopupWindow介面上的操作,其他並不會繼續進行直到執行dismiss()

MainActivity.java

1
2
3
4
5
6
7
8
9
10
11
12
13
14
15
16
17
18
19
20
21
22
23
24
25
26
27
28
29
30
31
32
33
34
35
36
37
38
39
40
41
42
43
44
45
46
public class MainActivity extends AppCompatActivity {
Button btn;
PopupWindow popupWindow;
View rootView;
@Override
protected void onCreate(Bundle savedInstanceState)
{
super.onCreate(savedInstanceState);
setContentView(R.layout.activity_main);
btn = (Button) findViewById(R.id.button);
btn.setOnClickListener(new View.OnClickListener()
{
@Override
public void onClick(View v)
{
if (popupWindow == null)
{
showPopup();
} else {
popupWindow.showAtLocation(rootView, Gravity.BOTTOM, 0, 0);
}
}
});
}
private void showPopup() {
// 載入popupwindow至view裡面
View view = LayoutInflater.from(this).inflate(R.layout.popupwindow_layout, null);
// 產生一個popupwindow的實例
popupWindow = new PopupWindow(this);
// 將view設定給新的popupwindow
popupWindow.setContentView(view);
// 設定popupwindow的高度和寬度
popupWindow.setWidth(ViewGroup.LayoutParams.MATCH_PARENT);
popupWindow.setHeight(ViewGroup.LayoutParams.WRAP_CONTENT);
// 取得主layout
rootView = LayoutInflater.from(this).inflate(R.layout.activity_main, null);
// 顯示popupwindow至主layout (顯示於底部)
popupWindow.showAtLocation(rootView, Gravity.BOTTOM, 0, 0);
// 設定為false則不響應除了popupwindow以外的touch事件
popupWindow.setOutsideTouchable(false);
}
}
1
2
3
4
5
6
7
8
9
10
11
12
13
14
15
16
17
18
19
20
21
22
23
24
25
26
27
28
29
30
31
32
33
34
35
36
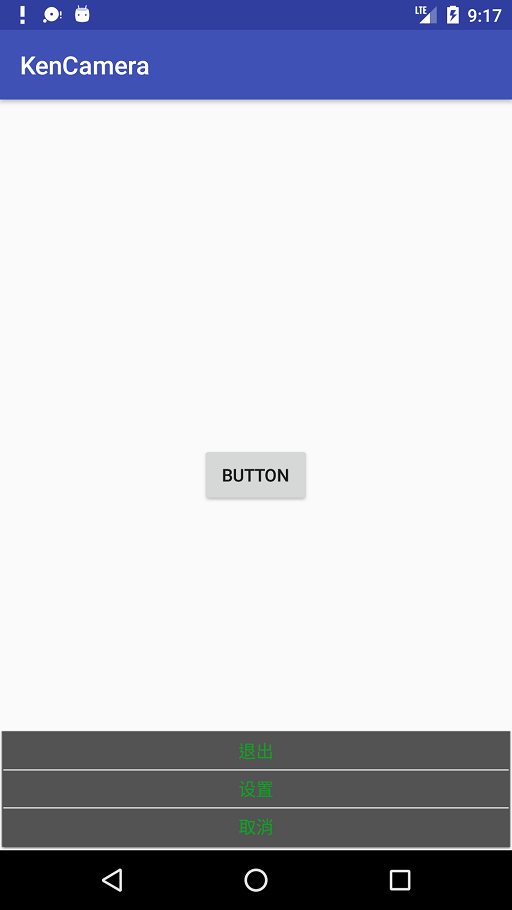
// popupwindow的layout
<?xml version="1.0" encoding="utf-8"?>
<LinearLayout xmlns:android="http://schemas.android.com/apk/res/android"
android:orientation="vertical" android:layout_width="match_parent"
android:layout_height="match_parent">
<TextView
android:id="@+id/tv_exit"
android:layout_width="match_parent"
android:layout_height="wrap_content"
android:layout_marginBottom="2dp"
android:layout_marginTop="2dp"
android:gravity="center_horizontal"
android:text="退出"
android:textStyle="bold" />
<TextView
android:id="@+id/tv_set"
android:layout_width="match_parent"
android:layout_height="wrap_content"
android:layout_marginBottom="2dp"
android:layout_marginTop="2dp"
android:gravity="center_horizontal"
android:text="设置"
android:textStyle="bold" />
<TextView
android:id="@+id/tv_cancel"
android:layout_width="match_parent"
android:layout_height="wrap_content"
android:layout_marginBottom="2dp"
android:layout_marginTop="2dp"
android:gravity="center_horizontal"
android:text="取消"
android:textStyle="bold" />
</LinearLayout>

dialog為非阻塞式的窗口,也就是說執行dialog在start之後,下面的程式仍會繼續往下執行,並不會等到dialog被dismiss之後才執行,而popupwindow則會等到被dismiss之後才會繼續往下執行程式。

How to use RecyclerView

RecyclerView

類似ListView及GridView,甚至能夠取代他們

RecyclerView 需要實作 RecyclerView.Adapter及Adapter的ViewHolder
1
2
3
4
5
6
7
8
9
10
11
12
// activity_layout.xml
<?xml version="1.0" encoding="utf-8"?>
<LinearLayout xmlns:android="http://schemas.android.com/apk/res/android"
android:orientation="vertical" android:layout_width="match_parent"
android:layout_height="match_parent">
<android.support.v7.widget.RecyclerView
android:id="@+id/recycleview"
android:layout_width="match_parent"
android:layout_height="match_parent" />
</LinearLayout>
拉好RecyclerView元件之後,還要建立item
1
2
3
4
5
6
7
8
9
10
11
12
13
14
15
16
17
// item.xml
<?xml version="1.0" encoding="utf-8"?>
<LinearLayout xmlns:android="http://schemas.android.com/apk/res/android"
android:layout_width="match_parent"
android:layout_height="wrap_content"
android:gravity="center_horizontal">
<TextView
android:id="@+id/textView2"
android:layout_width="wrap_content"
android:layout_height="wrap_content"
android:text="TextView"
android:textColor="#111111"
android:textSize="16sp"
android:textStyle="bold" />
</LinearLayout>
介面都完成後,就要開始打程式囉!
  • 首先建立一個RecyclerViewAdapter.java
1
2
3
4
5
6
7
8
9
10
11
12
13
14
15
16
17
18
19
20
21
22
23
24
25
26
27
public class RecycleViewAdapter extends RecyclerView.Adapter<RecycleViewAdapter.MyViewHolder> {
public RecycleViewAdapter(Context context) {
this.context = context;
}
// 這部份主要寫綁定layout的程式
@Override
public RecycleViewAdapter.MyViewHolder onCreateViewHolder(ViewGroup parent, int viewType) {
return null;
}
// 上面綁定layout後,在這裡實作物件功能
@Override
public void onBindViewHolder(final RecycleViewAdapter.MyViewHolder holder, final int position) {
}
// 執行的總次數
@Override
public int getItemCount() {
return 0;
}
// 自己寫ViewHolder來綁定控件
class MyViewHolder extends RecyclerView.ViewHolder {
public MyViewHolder(View view) {
super(view);
}
}

建立好之後就一個一個來修改囉

  • 第一步 - 這個CreateViewHolder是當item被建立的時候會執行一次,這裡通常做綁定layout的功能

    1
    2
    3
    4
    5
    @Override
    public RecycleViewAdapter.MyViewHolder onCreateViewHolder(ViewGroup parent, int viewType) {
    MyViewHolder holder = new MyViewHolder(LayoutInflater.from(context).inflate(R.layout.item,parent,false));
    return holder;
    }
  • 第二步 - 取得holder之後,需要自己寫一個class -> MyViewHolder來獲得layout上的元件

1
2
3
4
5
6
7
class MyViewHolder extends RecyclerView.ViewHolder {
TextView tv;
public MyViewHolder(View view) {
super(view);
tv = (TextView) view.findViewById(R.id.textView2);
}
}
  • 第三步 - 元件之後就可以在onBindViewHolder寫要對元件做的事情了

    1
    2
    3
    4
    5
    6
    @Override
    public void onBindViewHolder(final RecycleViewAdapter.MyViewHolder holder, final int position) {
    // tv就是上面MyViewHolder宣告的TextView
    // holder就是最上面onCreateViewHolder取得到的holder
    holder.tv.setText("Count: "+position);
    }
  • 第四步 - 最重要的三步都完成了,再來是更重要的最後一部

    1
    2
    3
    4
    5
    @Override
    public int getItemCount() {
    // 總共執行的次數,這會影響到產生的物件數量,如果這邊給0,那RecyclerView就不會顯示任何東西
    return 20;
    }

完成了之後,我們需要把RecyclerViewAdapter指定給RecyclerView

  • 回到MainActivity.java
1
2
3
4
5
6
7
8
9
10
11
12
13
// 進行RecyclerView物件綁定
RecyclerView mRecyclerView = (RecyclerView) view.findViewById(R.id.recycleview);
// 棋盤式
//RecyclerView.LayoutManager layoutManager = new GridLayoutManager(this,4);
// 瀑布式
//RecyclerView.LayoutManager layoutManager = new StaggeredGridLayoutManager(4,StaggeredGridLayoutManager.VERTICAL);
// 線性 ( 這裡用線性做範例 )
RecyclerView.LayoutManager layoutManager = new LinearLayoutManager(this);
mRecyclerView.setLayoutManager(layoutManager);
RecycleViewAdapter mAdapter = new RecycleViewAdapter(this);
mRecyclerView.setAdapter(mAdapter);

大功告成

Control widget position

控制控件位置

實現物件移動方法,使用Math.sin去做一個曲線讓物件可以順暢的上下位移。

activity_main.xml - 只要拉出一個Button 即可。

1
2
3
4
5
<Button
android:id="@+id/button2"
android:layout_width="80dp"
android:layout_height="80dp"
android:text="Button" />

1
2
3
4
5
6
7
8
9
10
11
12
13
14
15
16
17
18
19
20
21
22
23
24
25
26
27
28
29
30
31
32
33
34
35
36
37
38
39
40
41
42
Button btn2;
int values = 1;
boolean isRunning = false;
@Override
protected void onCreate(Bundle savedInstanceState) {
super.onCreate(savedInstanceState);
setContentView(R.layout.activity_main);
btn2 = (Button) findViewById(R.id.button2);
btn2.setOnClickListener(new View.OnClickListener()
{
@Override
public void onClick(View v)
{
if (isrunning)
{
isRunning = false;
nhandler.removeCallbacks(runnable);
} else {
isRunning = true;
nhandler.post(runnable);
}
}
});
}
Handler nhandler = new Handler();
Runnable runnable = new Runnable()
{
@Override
public void run()
{
if (values < 190)
{
float fff = (float) (Math.sin((double) values * 0.1) * 50) + btn2.getTop();
btn2.setY(fff);
values++;
} else {
values = 1;
}
nhandler.postDelayed(this, 10);
}
};

實現效果

思路

透過HandlerRunnable來達成不斷移動的效果
重點在於 -> Math.sin((double) values * 0.1) * 50
因為sin帶入1,2,3數值會是正數,當數值增加到4,5,6的時候數值會變成負數
所以values * 0.1 是為了讓物體位移的距離更小,達成一個滑順的位移效果
而在後面的* 50 則是為了讓移動幅度增加的一個附加值。


移動的物體

如果可以上下移動,那只要控制X軸,那就能左右移動囉!!

這邊使用的是Tangent,因為Tangent的曲線是平穩->急昇
( 可以讓物體由慢到快的移動 )

實現的部分,程式碼多加上一點點東西即可。

1
2
3
4
5
6
7
8
9
10
11
12
13
14
15
16
17
18
Handler nhandler = new Handler();
Runnable runnable = new Runnable() {
@Override
public void run()
{
if (values < 190)
{
float fff = (float) (Math.sin((double) values * 0.1) * 50) + btn2.getTop();
float ttt = (float) (Math.tan((double) values * 0.01) * 50);
btn2.setY(fff);
btn2.setX(ttt);
values++;
} else {
values = 1;
}
nhandler.postDelayed(this, 10);
}
};

實現效果 ( Gif有點 lag請見諒 )

|